Roofing Installation – What Elements Make Up a Roof?
Roofing installation involves several different elements that work together to protect your home from weather and debris. An expert roofer can guide you on the options that fit your goals, climate, and aesthetic.
Before they start the actual roofing, roofers will pull all the required permits and clear away any old shingles or underlayments. They will also clean up the yard and throw everything into a dumpster.
Roofing projects are not complete without the appropriate materials. Using high-quality roofing materials ensures your roof will function optimally and protect your home for years to come. Quality roofing also reduces energy costs by lowering your heating and cooling bills.
Choosing the right roofing materials depends on many factors, including climate, cost, and aesthetics. Asphalt shingles are the most popular choice for residential roofing and reroofing projects because they are economical, durable, and suitable for most climates. They are available in a variety of styles, including 3-tab shingles, dimensional shingles, and premium shingles. Some asphalt shingles even mimic the appearance of slate or cedar shakes to complement a wide range of architectural styles.
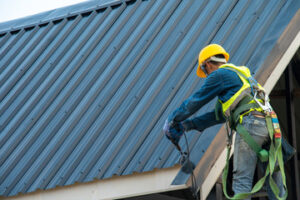
A roofing contractor should also have a variety of tools for the job, including a nail gun, roofing nails, and a shingle knife. Hard hats and protective eyewear are also essential for the safety of your team during a roofing project.
Other important roofing supplies include tarps, a roof leak barrier, and a roof ripper. A leak barrier, like GAF’s WeatherWatch mineral-surfaced roof leak barrier, helps prevent damaging roof leaks at the eaves and valleys of your roof. A roof ripper is a specialized tool for removing old shingles and other roofing materials from your roof. Tarps help keep your landscaping intact during a re-roofing project and are useful for collecting shingle pieces and stray nails.
Permits
Whether or not your roofing project requires a permit depends on the scope of work involved and local building codes. Large-scale projects such as total roof replacements typically demand a permit because they can significantly impact the structural integrity of a home or business. Permits provide a record of construction that ensures the new structure is up to code and meets municipal guidelines.
The cost of a permit can vary from city to city, but is usually between $150 and $400. While it may be tempting to skip out on obtaining a permit, doing so could be a costly mistake. Performing construction without a permit can result in fines and a possible loss of homeowners’ insurance coverage.
In addition to ensuring adherence to local code standards, a permit can also help protect against fraudulent contractors. Often, roofing contractors will need to be licensed and insured to get a permit. This is a great way to spot an unscrupulous contractor before they begin working on your property.
If you are considering a roofing project, it is always best to work with a trusted roofing company that will be able to navigate the permit process easily on your behalf. It is worth the extra expense to know that your project will be done correctly and in accordance with local regulations. After all, a poorly installed roof can lead to lasting damage and costly repairs.
Underlayment
Underlayment plays a crucial role in how your roof holds up against diverse weather elements and other forces. It protects the deck, keeps moisture out of the primary roofing material, and ensures that the structure’s integrity remains intact. Proper application and understanding of various underlayment types are crucial to a long-lasting roof system. The choice of underlayment is determined by local building codes, as well as the specific roof system style and slope. It’s also wise to seek usage instructions from the underlayment manufacturer to avoid voiding warranty coverage.
Felt underlayment is available in different variants, each with distinct properties. A 30-pound felt, for example, offers a high level of water resistance. It’s ideal for steep and sloping roofs requiring substantial water protection. However, it is not fully waterproof. A 15-pound felt, on the other hand, is more affordable and is suitable for most projects, including low-budget roofing jobs.
Contractors can also use rubberized asphalt underlayment, a synthetic membrane that is completely waterproof. It has excellent sealing abilities and seals around fasteners, as well as a non-skid surface to prevent workers from slipping on the roof. It’s also fire resistant, making it an excellent choice for drier climates that are susceptible to wildfires. Synthetic underlayment is more resilient than felt and can withstand varying environmental conditions, but it’s also more expensive. Regardless of the underlayment chosen, roofers should exercise caution and adhere to strict safety standards on the jobsite to minimize injuries and property damage. This includes using appropriate fall protection equipment and ensuring that roofers wear shoes with good traction, as the surface of underlayment may vary significantly due to environmental factors.
Flashing
Flashing is one of the most important parts of a roof. It’s thin metal material installed to help prevent water leaks in problem areas like roof penetrations, chimneys, valleys, and more. Flashing is usually made of either metal or a weather-resistant plastic and can be exposed or concealed, depending on its location.
A roofing contractor will install base flashing where the roof plane meets a vertical protrusion, such as a chimney or dormer. It’s a piece of metal that sits in between the gap and is covered with additional flashing to help protect the joints where they overlap. A roofer will also install headwall flashing where the roof slopes meet at a wall or penetration, such as a vent pipe or window opening. It’s a bent piece of flashing that’s installed behind the siding of the wall and over a course of shingles.
Another type of roof flashing is counter flashing, which is a long piece of flashing that runs along the ridge of a roof. This is an extra layer of protection to help prevent ice dams in the winter and leaks in the spring. A top-tier roofer will carefully install this to keep your home protected.
Finally, a roofing expert will install drip edge flashing on the eaves, gables, and rakes of your roof. This is an angled strip of flashing that helps direct water away from fascia boards and roofing materials. It’s also used around the base of a plumbing vent or skylight to help waterproof those spots.
Shingles
Shingles are the most recognizable part of a roof and serve multiple functions. They provide protection from weather events and create a beautiful aesthetic to the home. They are available in different materials, each offering unique advantages and price points. Ultimately, the choice of which shingle to use will be based on personal preference and budget.
Before beginning shingle installation, it is important to prepare the work area. Clear the area of any debris or tripping hazards and cover any plants close to the house with sturdy tarps. This will protect them from dropped tools and roofing material while still allowing sunlight to reach them. Additionally, pull any yard games or furniture away from the exterior of the house to prevent damage during shingle installation.
Begin the shingle process by applying a row of single-layer 3-tab shingles, also known as a starter course, along the eave. This row will help protect the roof and is designed with a self-sealing adhesive strip to seal the tabs of the first full course of shingles.
Next, apply the shingles in a staggered pattern. Ensure that each shingle is overlapping the one below it by at least 6 inches. Continue laying out courses of shingles in this manner until reaching the ridge. At this point, it is time to start securing the shingles. Using a chalk line and proper nailing technique, secure each shingle until the entire ridge is complete.
Ridge Cap
A ridge cap is one of the most important but often overlooked components of a roof. They are specifically designed to cover and protect the ridge area of a sloped roof, where two roof slopes meet. They also add a finished, attractive appearance to the top of your home.
Without a ridge cap, the ridge area is susceptible to moisture infiltration, mildew growth and damage to the roof structure. Ridge caps are also a key factor in the prevention of roof leaks.
While you might be tempted to use regular shingles on your roof’s ridge, it’s best to choose a special shingle that’s made for ridge capping. These shingles are thicker and pre-bent to facilitate the installation of a secure and snug fit over the roof peak. They are smaller in size as well, helping them better shield the roof from water and snow.
Ridge caps are available in a variety of colors and styles to complement any roofing material. You can even find them designed to reflect sunlight and reduce heat build-up, lowering your energy costs. Many ridge cap products, like the RapidRidge system, improve your home’s ventilation while providing an added layer of protection against damage and leaks. It’s a great way to protect the integrity of your roof and keep it looking beautiful for years to come. Inspecting the ridge line regularly and taking prompt action for any wear or damage can help you avoid costly repairs down the road.